Launching a Multilingual Site on Webflow with Weglot
In an earlier post, we elaborated on the various approaches that we evaluated to launch an internationalized site on Webflow. We described how we settled on the final approach of using Weglot. In this post, we will delve into the details of how to configure Weglot and elaborate on some tricky aspects of launching the website with it.
Getting started with Weglot
After you purchase the Weglot pricing package that is best for your needs (it is generally based on the number of words you need to get translated), you will be guided through the setup process. Generally speaking, you have two options: Javascript and Subdomains. For Javascript, it is a quick and easy integration – simply copy-paste a short Javascript code in your website and it takes 5 minutes to install and doesn’t require any coding knowledge. For subdomains, your translated pages will be on subdomains (like fr.mysite.com). It can take 15 minutes to install and requires you to add DNS record entries. This integration is better for SEO as you have a dedicated URL for each language.
In our project, we selected an advanced approach that was a hybrid of “Javascript” and “Subdomains”. In particular, the customer wanted a subfolder approach rather than subdomains. They didn’t want domains like fr.moloco.com or zh.moloco.com. Rather they wanted folders like moloco.com/fr or moloco.com/zh. To achieve this, we had to leverage a new capability of Weglot. An important note: The subfolder approach works only for the real domain, and not the free domain provided by Webflow for the development environment. So, to test the folders, you have to configure Weglot to point to the Webflow environment.
These steps are outlined below. First, create a project:
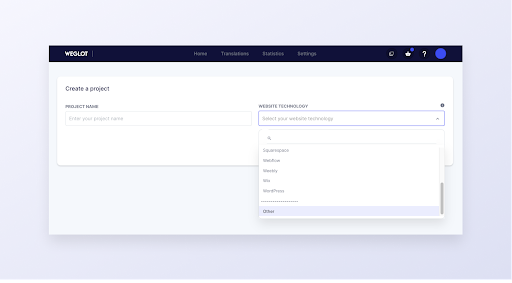
Click on Use Javascript Integration

Than add your languages
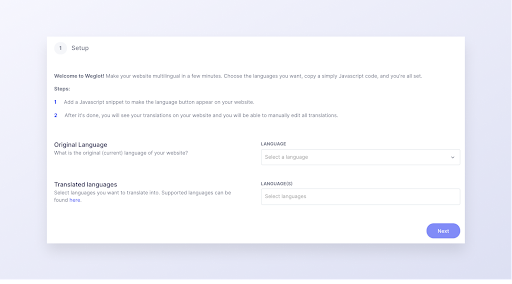
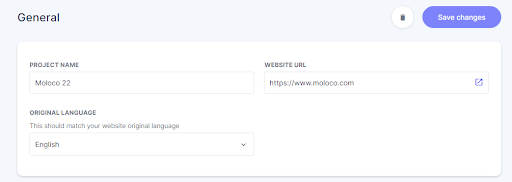
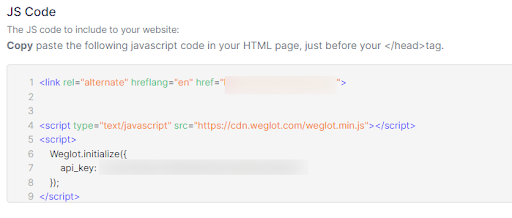
After you are done, copy the JS code and paste into your website header.
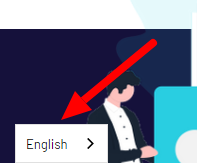
Immediately, you can start seeing the Weglot language switcher on the bottom left (which is the default design).
Implementing Translations in Weglot
Click on the “Translations” tab and you’ll see all the languages that you selected during setup. Here you will also see the number of translated words for each language.

In the URLs Tab, you can find a complete list of pages for your website. Should you notice that any particular pages are missing, you can manually add them.
- Go to the bottom of the page and click on the Missing URL link.
- It will scan your website again and provide you a list of page URLs which haven’t been added.
- You can also select URLs and add to the translation.

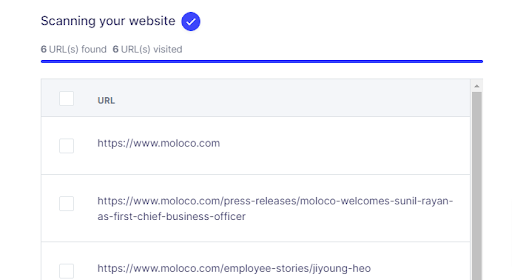
To manually add a URL to the translations:
- In the browser, go to your website and open the URL that is not translated
- Change languages from the weglot language switcher at the page bottom
- Go back to the URL tab in Weglot and search for this URL
- It will now show up
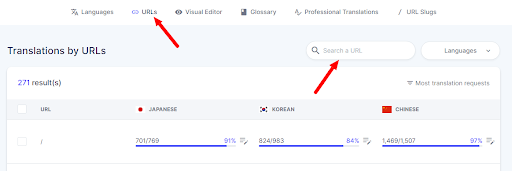
A few other features in Weglot:
- Glossary: If you want to exclude some branded words from translations, you can use the Glossary option. We can set up based on language as well.
- Dynamic Elements: Sometimes weglot can’t detect a few blocks or dynamic elements for translation so this can help us to translate using css selectors.
Custom Designing your Language Switcher
The customer wanted to customize the language switcher to make it look like below:

To achieve this, we had to first configure the JS as shown below:
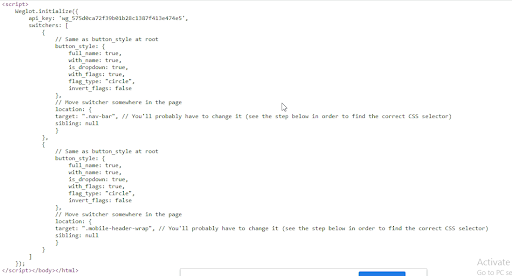
As you can see, there are several options available:
- Customize the display language name, flag..etc
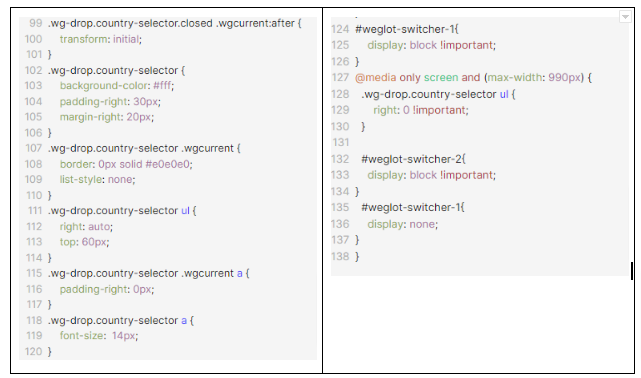
- Create custom css to implement based on our unique design
- We can also update language switcher appearance such as language name changes, flag changes…etc
Additional design options are shown below:
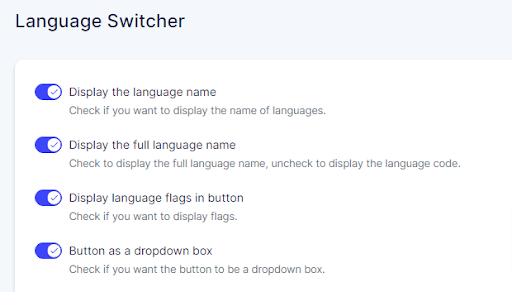

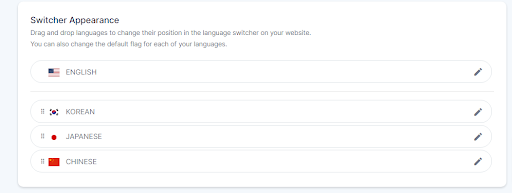
Below is the custom CSS that we designed for the language switcher design:
Launching the Site and some associated WebOps
When the site is ready to launch, you can start these activities. The first set of activities is on the Weglot side:
Change the main domain URL to point to the real website URL and make sure to select “subdirectories” as an option.
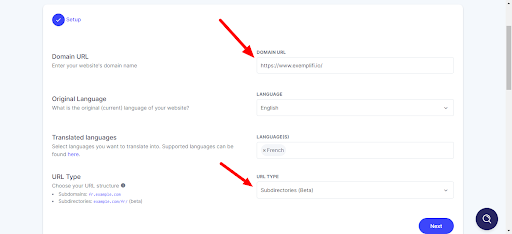
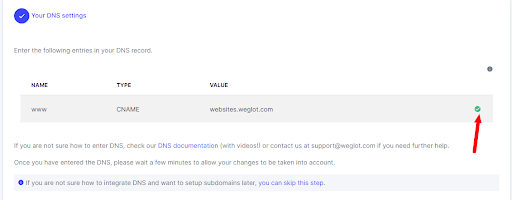
At this point, you will get two suggested CNAME records. In the next section, we will show you how to setup these up in your domain registrar. When that is done, you will get a green checkbox indicating that the setup is working fine.
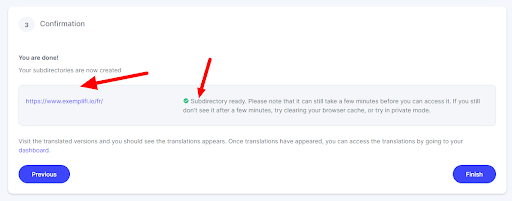
When you are done, the final step looks like this:
From the domain registrar side, you have to add the two CNAME records that you got from Weglot as shown below:
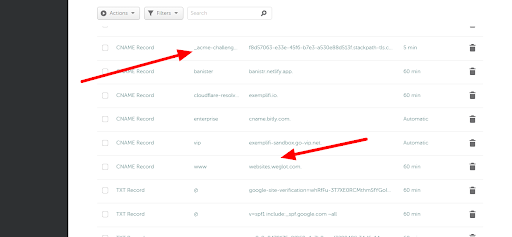
Note: We have to replace webflow www CNAME record in Domain registrar with weglot www CNAME so weglot will take care of www redirect.
Important Hreflang Checks and Webflow Canonical URL Settings
When launching a multilingual site, we have to be very careful on the SEO front because Google can easily consider the content to be duplicates and downgrade your site’s SEO ranking.
There are two things to do to avoid this: Setup Canonical URLs correctly in Webflow and also do Hreflang checks on Weglot.
To setup the Canonical URLs, go to the SEO settings tab in Webflow and establish the Global Canonical URL:

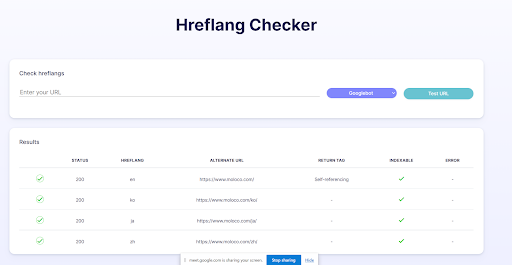
To make sure the Hreflang settings are working properly, use the https://www.hreflangs.com/ tool as shown below.
Summary
Building multilingual sites is the need of the hour if you want to showcase your business to a diverse audience base. In this article, we’ve highlighted how you can simplify the task of setting up a multilingual website using the Weglot addon for Webflow. With Weglot, we were able to provide our client the multilingual solution they needed and at the same time enhance customer experience for users of their website.
In case you missed it, here is the 1st part of our series on Launching a Multilingual site on Webflow
If you liked this insight and want more updates, we’d love for you to join us on Linkedin at Exemplifi, Facebook at ExemplifiSites or Twitter at ExemplifiSites.
