
Outlook Attachment Size Limits (and how to work around them)
You’re sending out your emails, promising a valuable resource to solve your lead’s pain points. You’ve prepared your research, your presentation, EVERYTHING, and then you hit the size limit wall.
Well, that’s a bummer.
It’s vital to understand and be aware of size limits when you’re planning on sending documents because if at the moment of truth, you’re not able to follow through in a timely fashion, you’re going to seem like a flake on your first interaction with your leads.
We’ll talk about the size limits on Outlook and how you can adjust, but we’ll also give you some tips to work around these limits so that you’re always ready to go and send your leads the best resources!
Outlook size limit
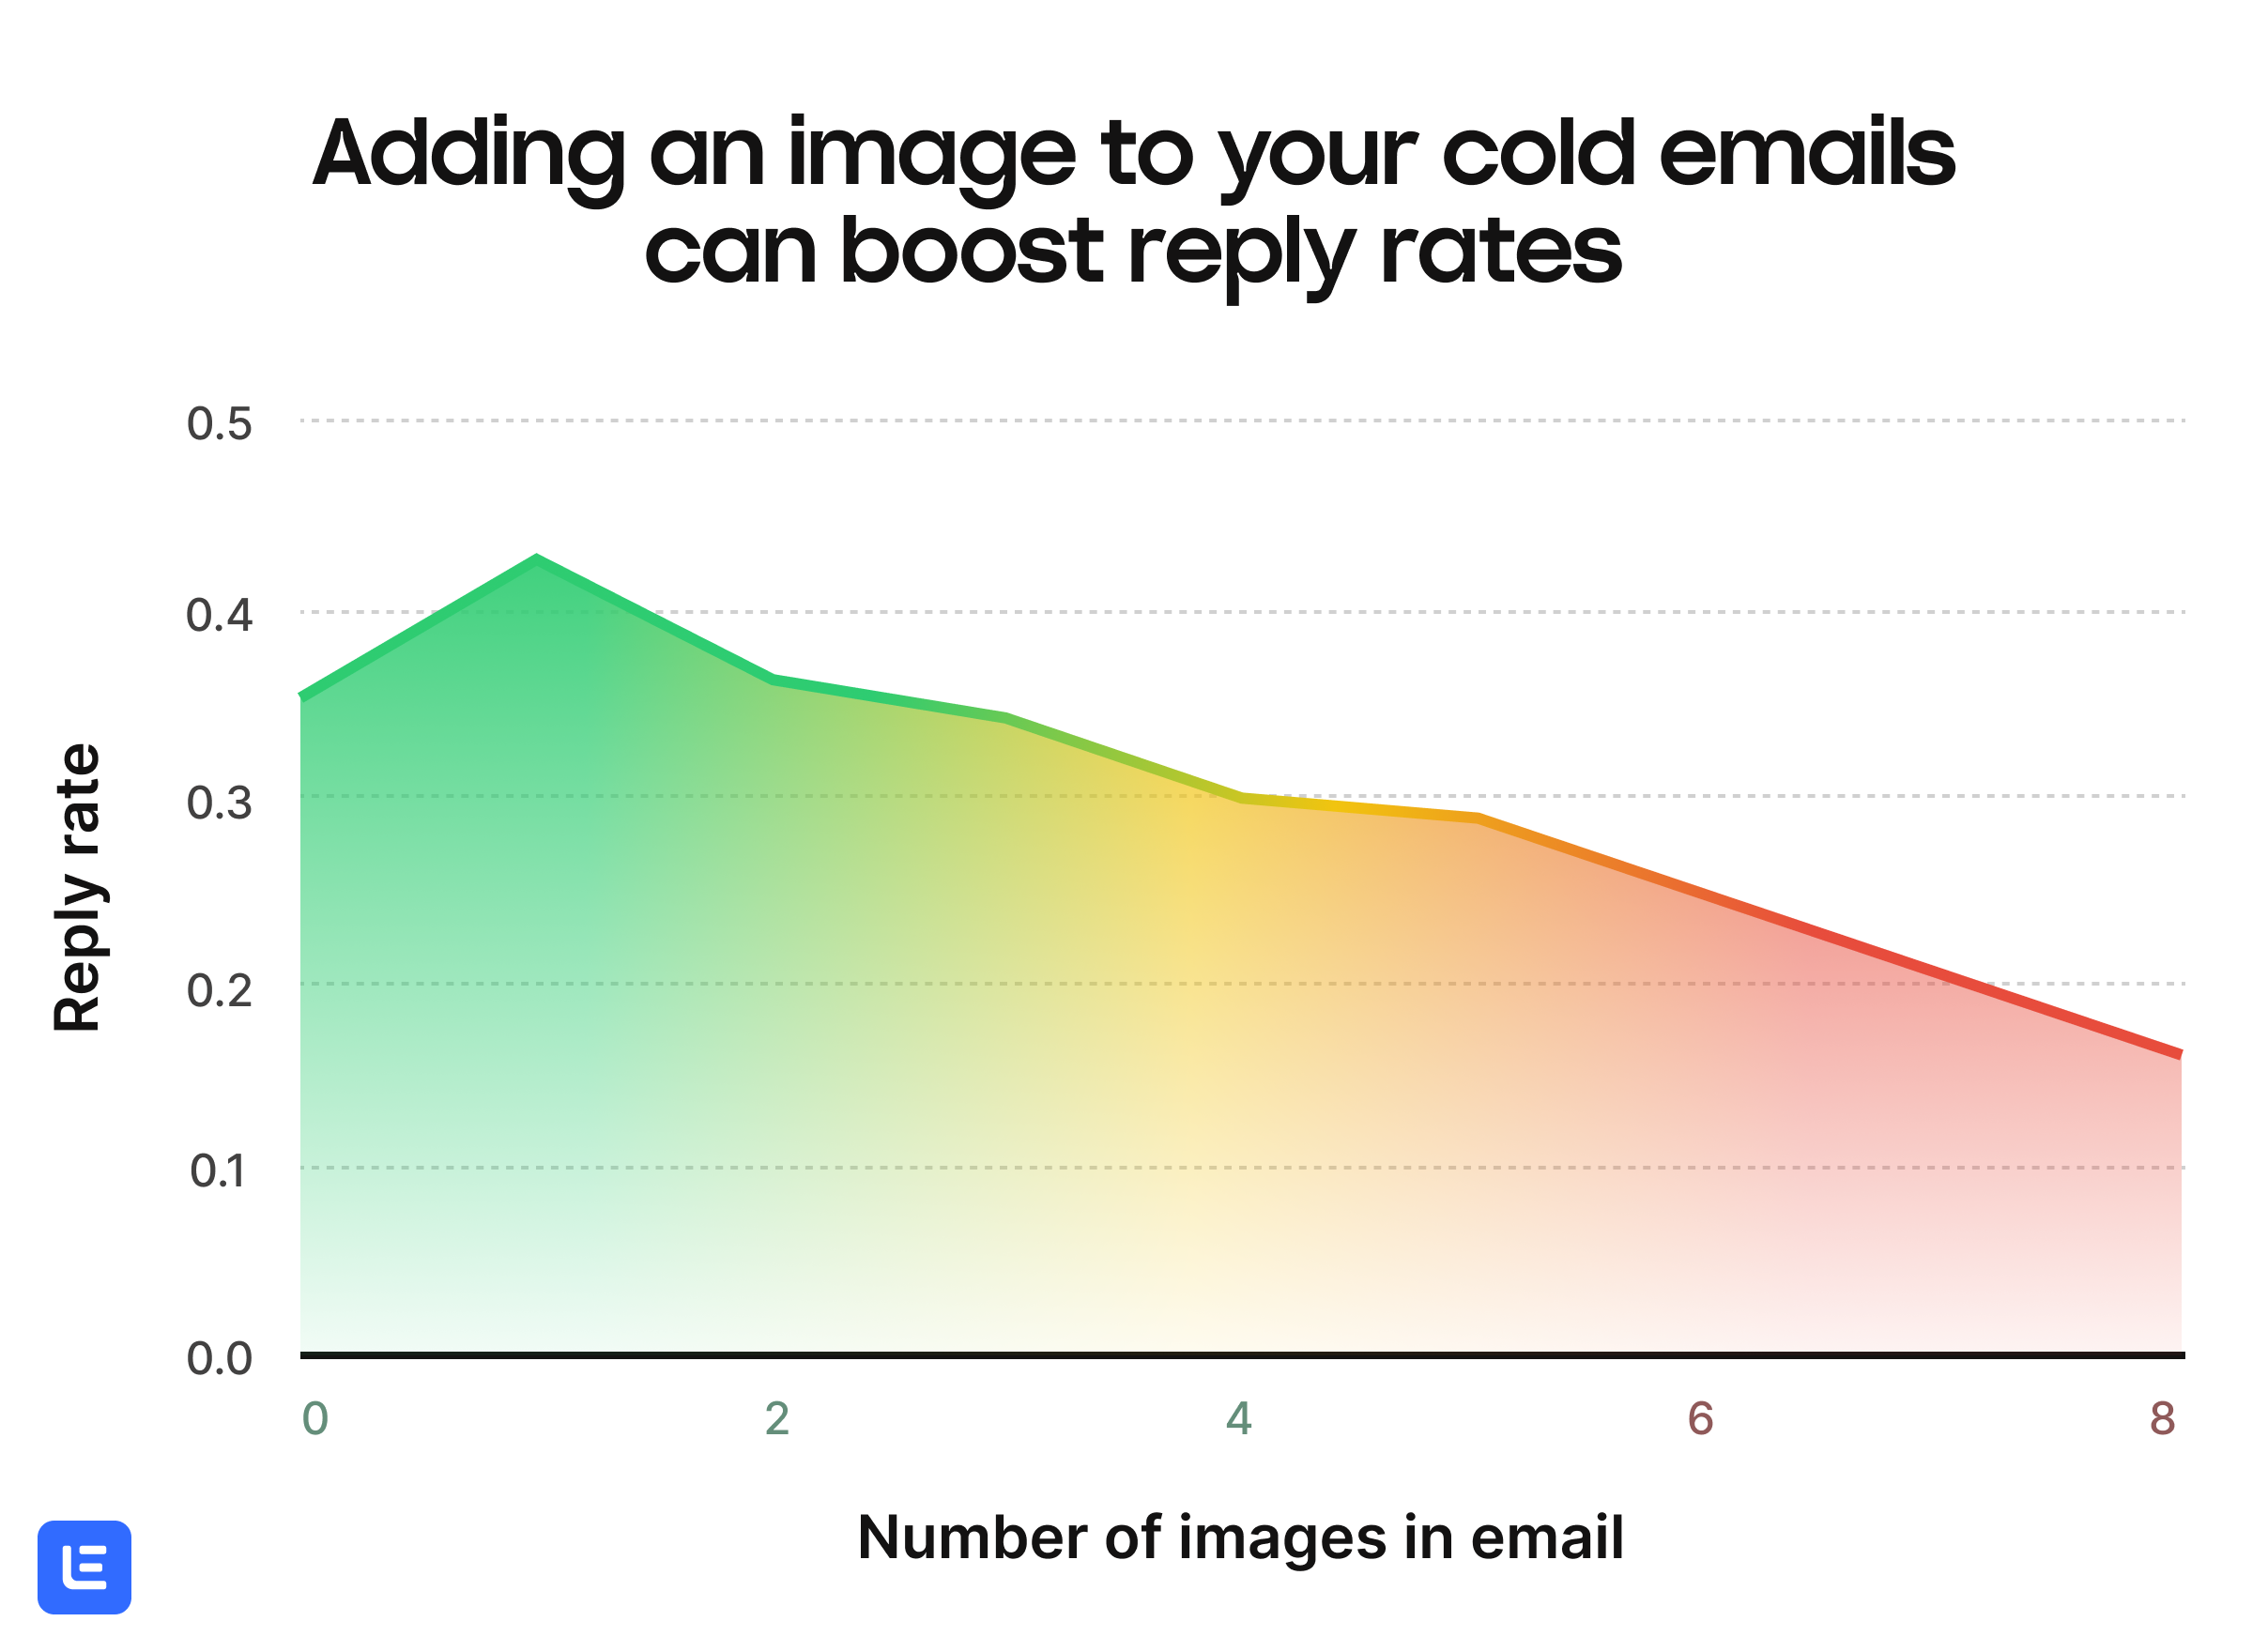
Including images in your cold emails is always a good idea, but the problem is that sometimes images are way too large for an email.
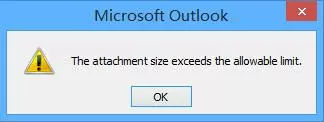
You’ll receive an error message if you attempt to attach files larger than the maximum size limit.
There are a few ways to work around this size limit, including using a file-sharing service or compressing the file.
Outlook sets these limits to prevent the uploading of large attachments that exceed the limits of most internet service providers.
Size limits depend on the type of account you are currently using.
- Typically, for both Gmail and Outlook, the combined size file cannot exceed 20MB
- The exchange account limit is set at 10MB
- When using a Microsoft 365 subscription, the limit increases exponentially and goes up to 150 MB
While the primary storage is on the server, Outlook maintains local copies in .pst or .ost files for offline access and convenience on your computer.
By increasing the .pts and .ost file size limit, your Outlook attachment size limit can increase up to 95 GB.
By adhering to limits, you also ensure that your emails land in your lead's main inboxes, which is the ultimate goal of cold emailing. Or any emailing for that matter, right?
Follow this deliverability checklist to make sure your emails always land in the right place!
How can you work around these limits?
Although limits are there for a reason, when there’s a will, there’s a way.
These four methods will help you work around limits so that you can always get your message across.
Method 1: Compress your file
Compressing a file reduces its size, making it easier to store and share.
Select the File: Locate the file or folder on your computer that you want to compress.
⬇️
Right-click on the File or Folder: Once you've found the file or folder, right-click on it to open the context menu.
⬇️
Choose "Compress" or "Send to" Option: In the context menu, you should see an option like "Compress" or "Send to." Select this option to begin the compression process.
⬇️
Check the Compressed File: Verify that the compressed file has been created successfully and that it's smaller in size compared to the original file or folder.
Alternatively, you can use compression software like WinZip, WinRAR, or 7-Zip to compress files and folders. These programs offer additional features and customization options for compression.
Other apps like WeTransfer, work great for all jobs that involve sending large attachments, such as videos.
Bear in mind that while compression reduces file size, it may also slightly reduce the quality of certain file types, such as images or videos.
Method 2: Segment your file
If after compressing your file into a .zip file it’s still too large, you could use a compression toolto segment your file into several different files.
This is a good option if you wish to send a small part to your lead as a kind of “preview” or “sneak-peak”.
However, if you plan to send the entire file this way it may be too much work for your leads, as you’re making them piece the entire thing together.
Besides, it could be much too time-consuming for you.
Method 3: Increase the attachment size limit
With Outlook you can adjust the size limit.
Press the Windows + R key and type “regedit” to open the registry editor on Windows.
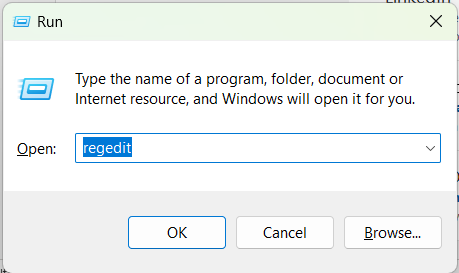
⬇️
Follow this path: HKEY_CURRENT_USER\Software\Microsoft\Office
At this point, choose your version of Outlook:
- 2007 → 12.0
- 2010 → 14.0
- 2013 →15.0
- 2016 and 2019 → 16.0
Next, go to Outlook/Preferences
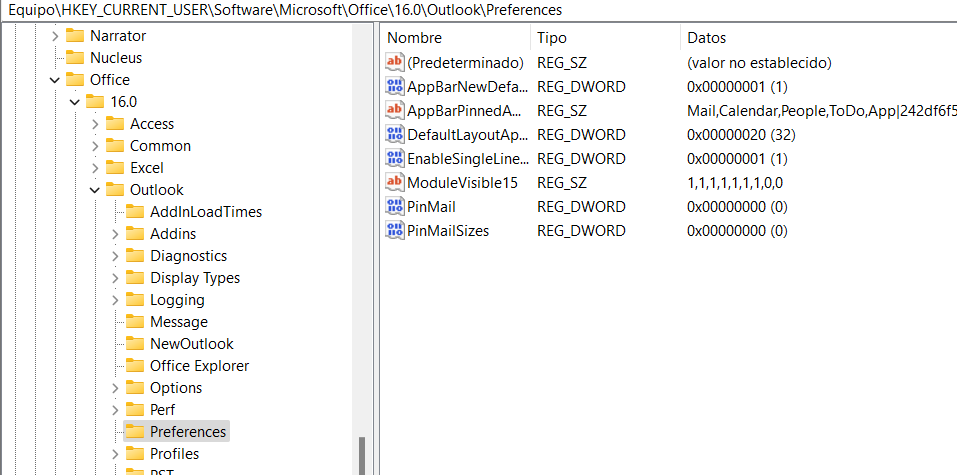
Find the maximum attachment size and insert your preferred attachment size limit.
⬇️
Close the registry and reopen Outlook to send larger files.
Should you need more information, go to the Microsoft help pages.
Method 4: Cloud-based Storage Service
This is probably your best bet, just include a link and your leads can access your documents.
These storage services include Google Drive, OneDrive, etc.
Simply upload your documents, (make sure they’re nicely organized so your recipients can access the documents easily)
⬇️
Change the privacy settings so anyone with the link can access the files
⬇️
Copy your link
⬇️
Paste it in your email!
Pro tip: Use a widely known storage service. If your leads spot an odd link in a cold email chances are they’re going to consider it a scam and quickly pass.
It’s also a good idea to not send the link on your first email, rather hang on to it, and offer a sneak peak (like an image) on your first email to catch your lead’s attention.
Key Takeaways
Adding images, personalized videos, and other files is always a good idea to increase your reply rates, but if they're not uploaded correctly you could see a negative impact on your deliverability.
So make sure you're aware of size limits and how to effectively work around them to make your emails really stand out!